Summer School – Blocking
I’m taking a bit of time off this month, but I wanted to make sure you had something to do while I’m napping (or, more likely, sweeping out the garage, getting drywall dust out of my cabinets, or planning next year’s projects…but napping sounds better).
On Mondays, I’ll introduce a topic or skill and provide a bunch of links and resources to help you learn more. Later in the week, I’ll show off a few favorite patterns so you can do some homework. The featured patterns will be on sale for one day each, so come back each weekday to see if there’s something that catches your eye!
We spent the last three weeks talking about actually knitting things…like about the stitches. Now I want to talk about what you do when you’re done with the knitting part. I want to talk about blocking. And I know some of you just rolled your eyes and sighed and clicked away. And that’s totally cool. You’re the boss of your knitting, and you get to do what you want. But if you want your knitting to look it’s best, you need to block it. So let’s talk about it.
First, and most importantly, blocking isn’t stretching. Blocking can involve stretching, but it doesn’t have to. The only thing it absolutely must involve is water, and I’m going to make a strong argument that it should involve soap, but we’ll come to that in a second. (Just a small disclaimer, this all applies to yarn with at least some animal fiber. Most of it holds for plant fibers too. But blocking acrylic is a whole other thing, and since I’ve never actually knit with 100% acrylic yarn, I’m not super qualified to talk about it.) The most important thing that happens when you block is that you get your stitches to relax (by getting them soaking wet) and then you let them dry in the shape you want them to be in. If your fabric isn’t lacy, you may not need to stretch your fabric much at all. Think ‘pat it into place’ not ‘yank it till it screams.’
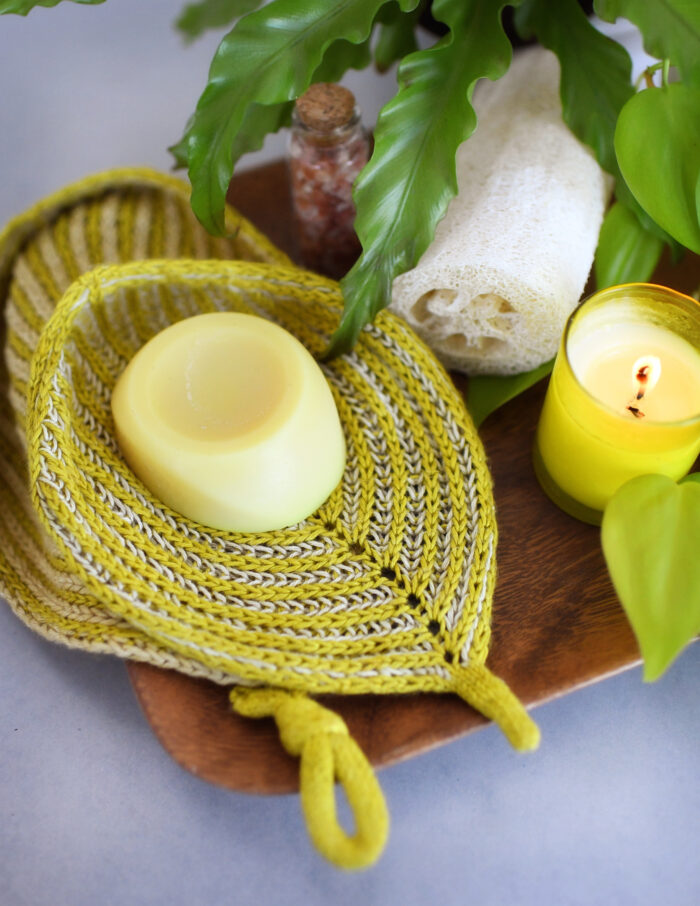
Now, I happen to believe that, since you’re going to be throwing your knitting in some water to get it soaking wet, this is a good time to give it a little wash. Think about all the places you dragged that project while you knit on it…did it ever find itself in a restaurant? the cupholder of a car? the tray table of an airplane? Even if you only knit in your perfectly pristine home, did you wash your hands every time you sat down to knit? Did you manage not to snack while you knit? Did you keep your cat off your lap the whole time? Did your children stay away? Even if you’re 100% sure you keep a house so clean it would make Martha Stewart blush, I’ll just quietly mention that the various skin oils and skin cells you leave on your knits in the process of making them can help attract wool eating critters, so you really do want to give it a wash. It’s not hard, just add a tiny bit of your favorite wool wash (the one in the picture up there is new and I’ll give some away at the end of the post) and let it work its magic.
Lift your knitting out of the water (it will be heavier than when it was dry, so sort of put your hands under it and scoop, don’t grab a corner and dangle all that weight from one spot), and give it a couple of good squeezes (don’t twist, just squeeze) to get the excess water out (ahem…if you have spiky rings or bracelets, this is a great time to take them off for a minute…ask me how I know). Lay it on a clean towel (dish towel is fine for socks or hats, bigger towel is good for shawls or sweaters), wrap it up jelly roll style, and stomp on it a few times to get even more water out. Now get it into whatever shape it needs, and let it dry. If it’s a fairly simple project, that could literally mean laying it flat on the kitchen counter (or somewhere else waterproof) and leaving it alone. But I want to run down some of the more…ah…eclectic blocking choices for more shapely projects.
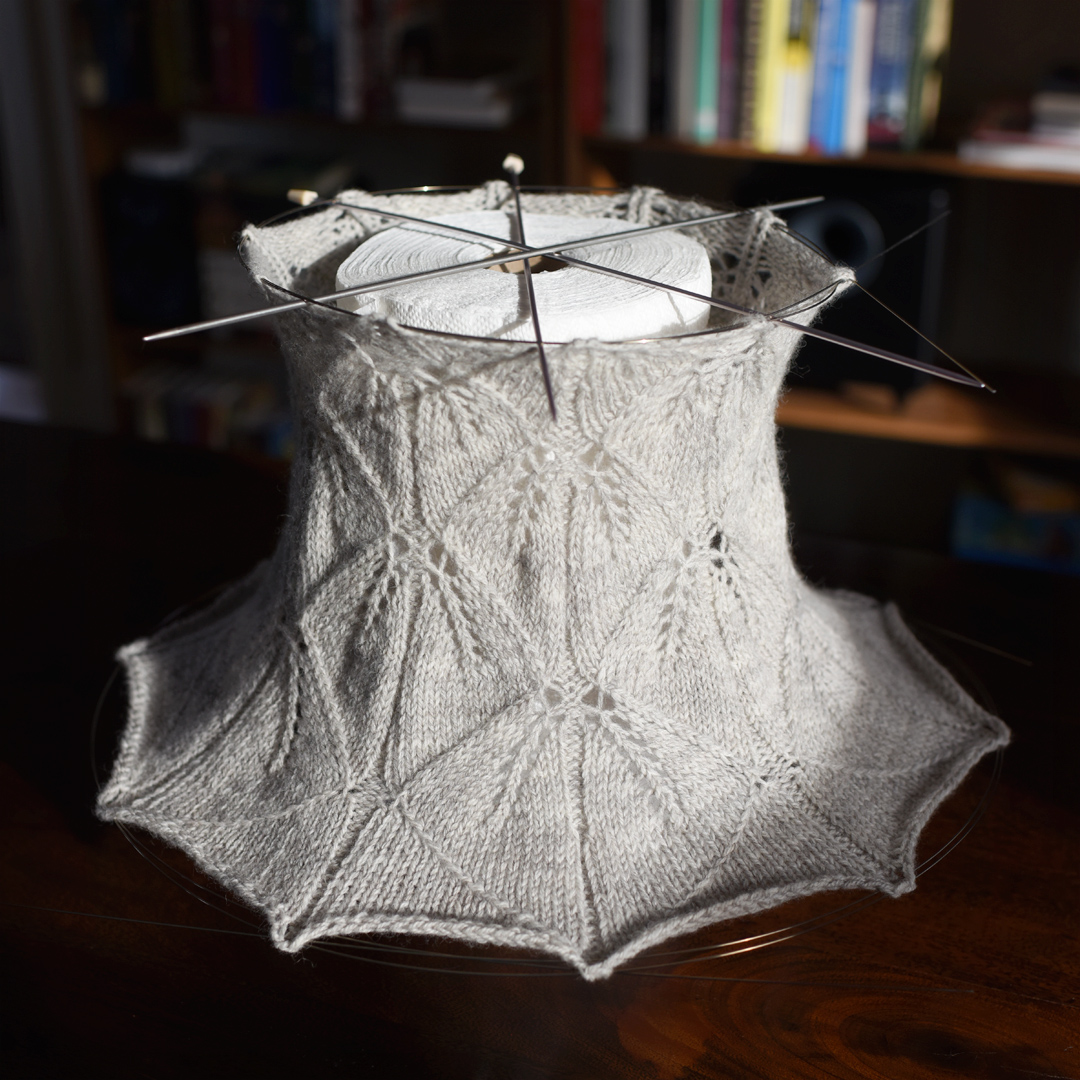
Let’s start with cowls. I want my cowls to dry under a bit of tension to open up the stitch patterns, and I don’t want to lay them flat, because then there will be a crease on the side. So I…being the nut I am, thread blocking wires through the top and bottom (to hold it open and under tension) then run knitting needles (or dowels or whatever else is handy) under the wires at the top to make a support frame and hang the whole thing from a roll of paper towels. It looks like a terrible lamp shade, but it works perfectly.
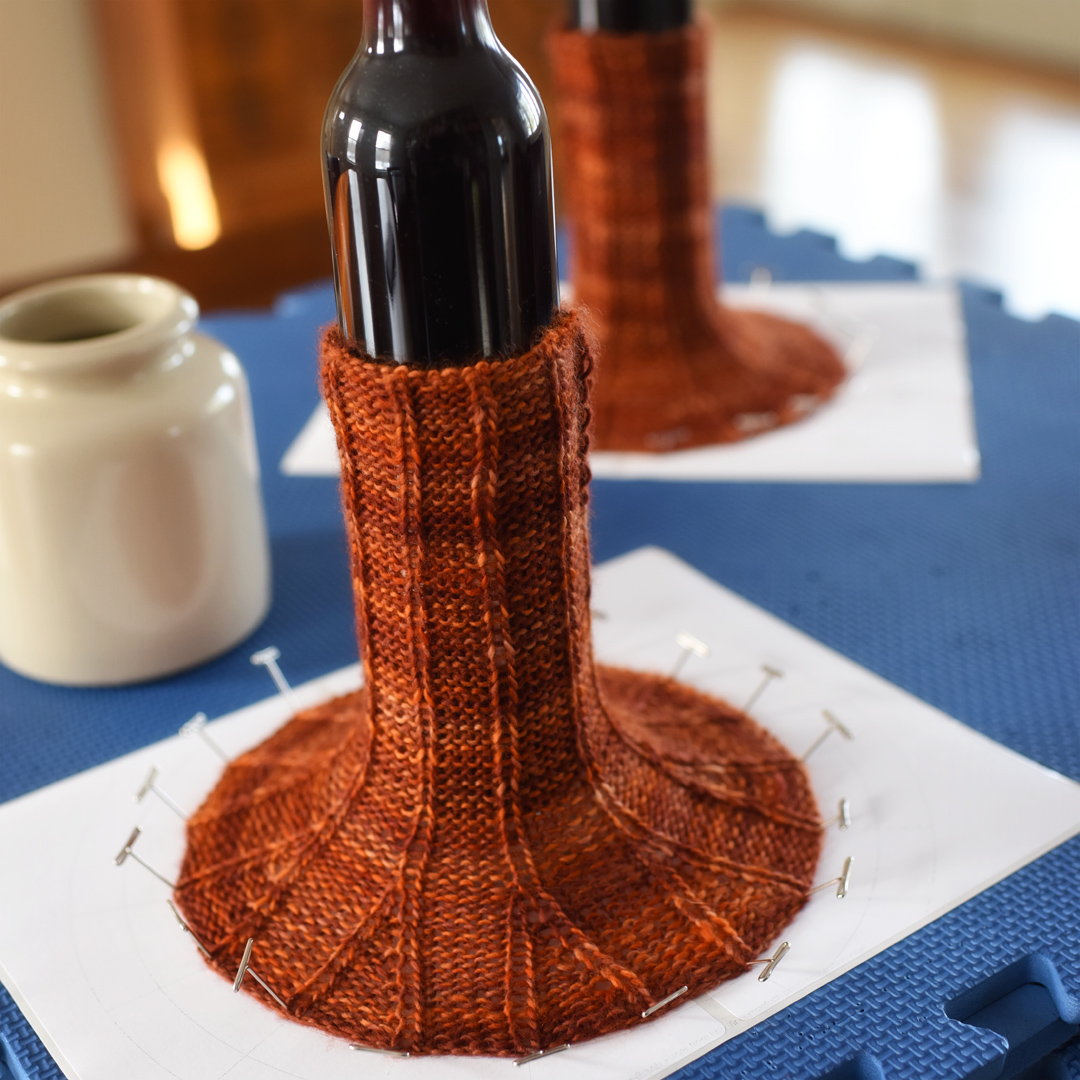
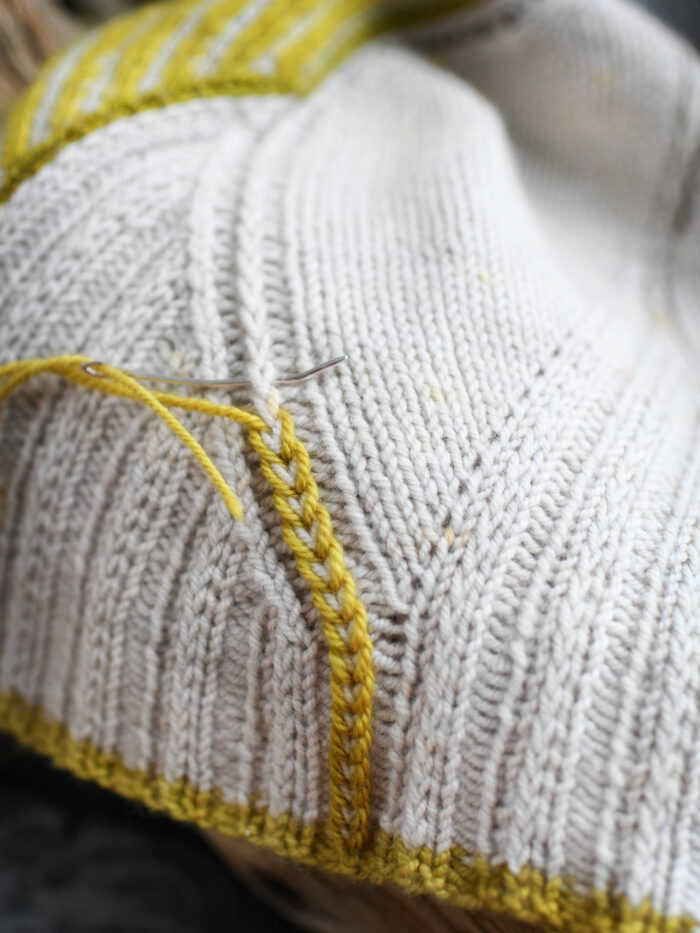
A similar principle applies to flared cuffs (my favorite favorite favorite thing to knit). I don’t want to dry them flat (because you’ll get creases), and I do want to hold the flared part out and in place. So I print out custom graph paper with radial spokes (so I can pin out the flared bit evenly), put the cuff over a bottle (shampoo…olive oil…perfume…wander your kitchen and bathroom and find something), and pin the flare out.
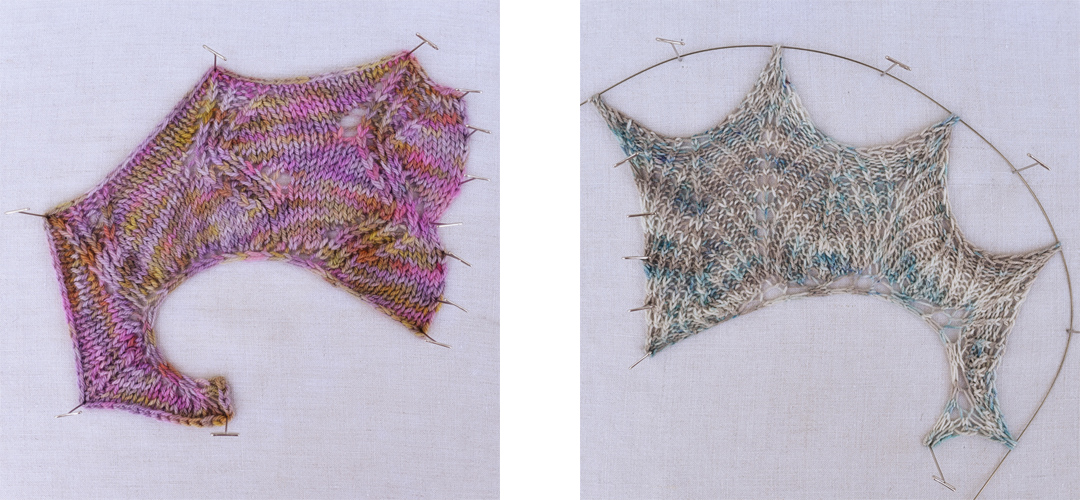
For lacy things, you are going to want to go ahead and put your knitting under tension (all lace looks like a mistake before it’s blocked…I promise you really do want to block it). These are pictures of swatches being blocked (shawls are big, it’s hard to take a picture of them all at once, hence the picture of swatches). You can either use pins (tedious, but less stuff to buy) or invest in some blocking wires and save yourself a lot of time.
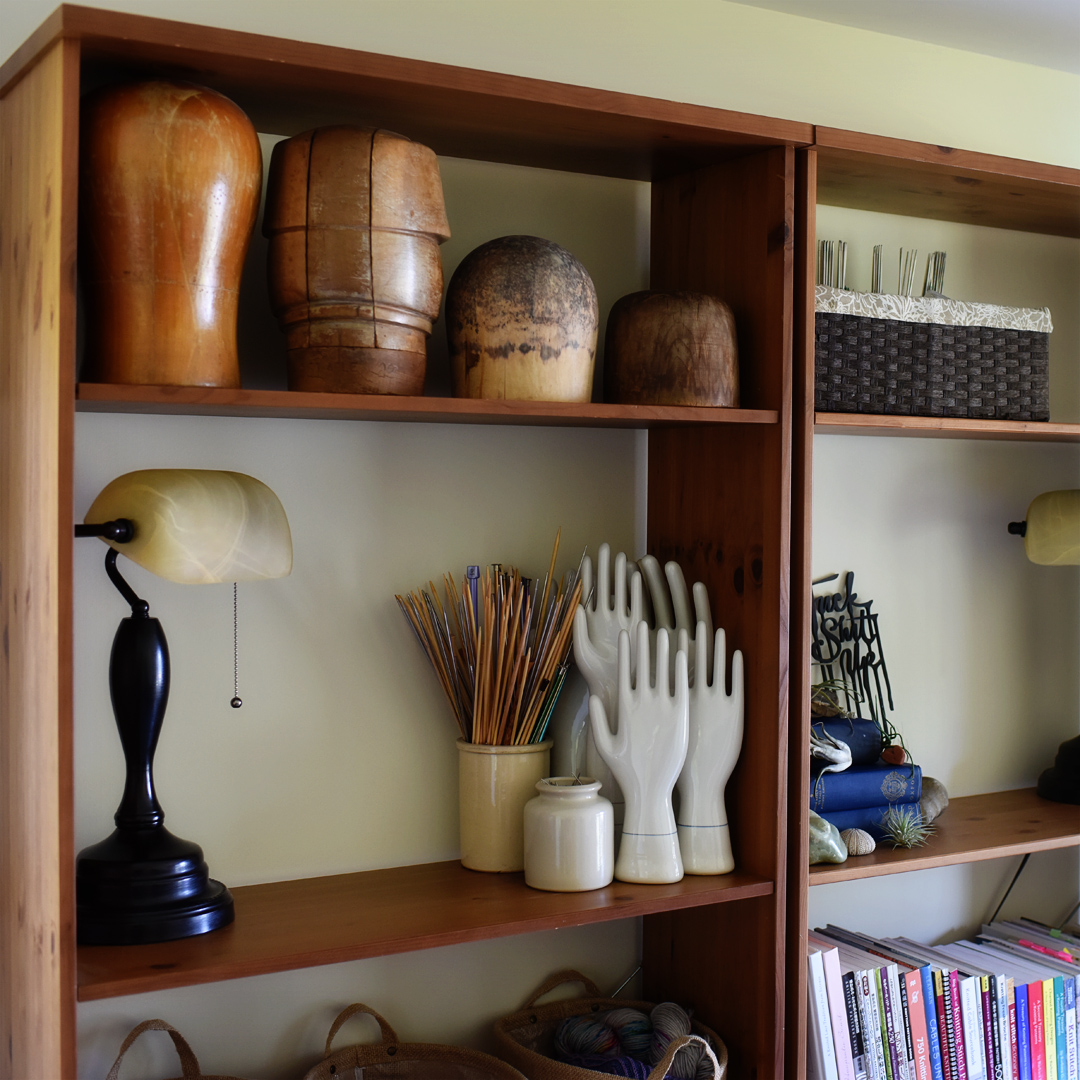
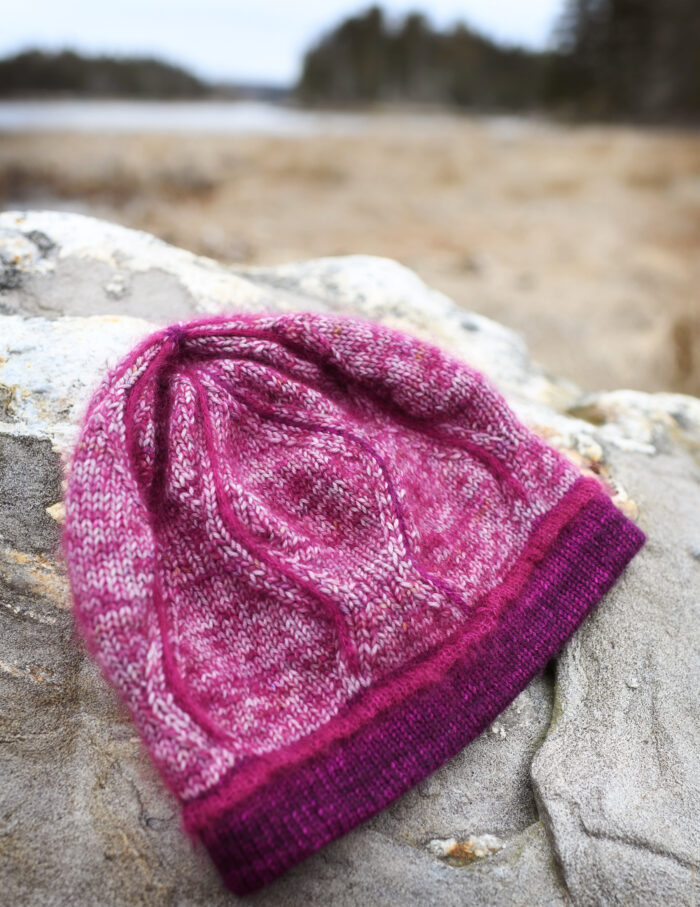
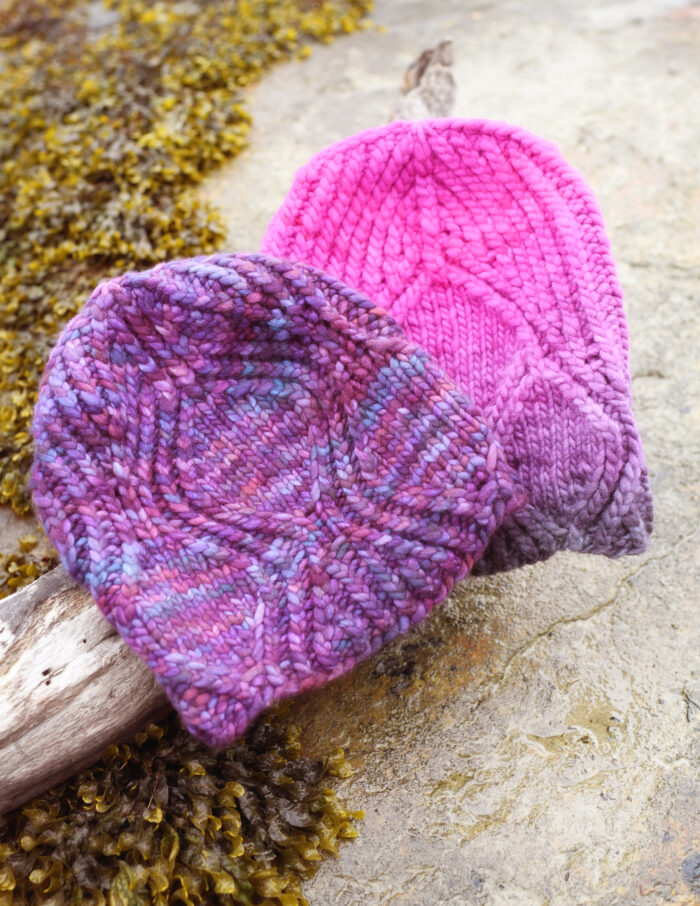
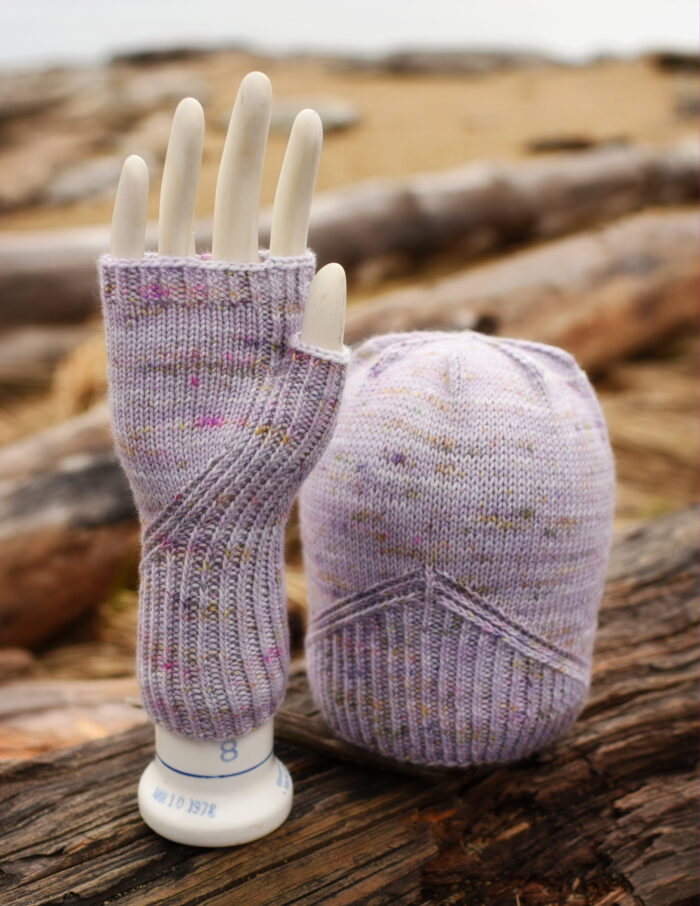
Now…now we’re going to take a brief digression and talk about the stuff I have because this is my job that you probably don’t need…and what you can use instead. I have a whole bunch of head and hand forms that I use to block and take pictures of hats and mitts. If you want some, you can find them on etsy or ebay (search ‘vintage hat form’ or ‘vintage glove form’). I think they’re pretty, and for me, they’re useful. If you don’t want to buy into that level of props, you can (and should!) block your hats on something else. Balloons work great (measure to be sure you’re blowing them up to the right size, heads are bigger than you think). Mixing bowls work great, so do vases. I’ve wrapped an ice bucket in a towel in a hotel room and blocked a hat on that. Just get something head sized, roundish, and waterproof. Same thing for hand forms. Scavenge around for an appropriately sized cylinder (drinking glass? fancy vinegar bottle? pringles can?), you can totally find something.
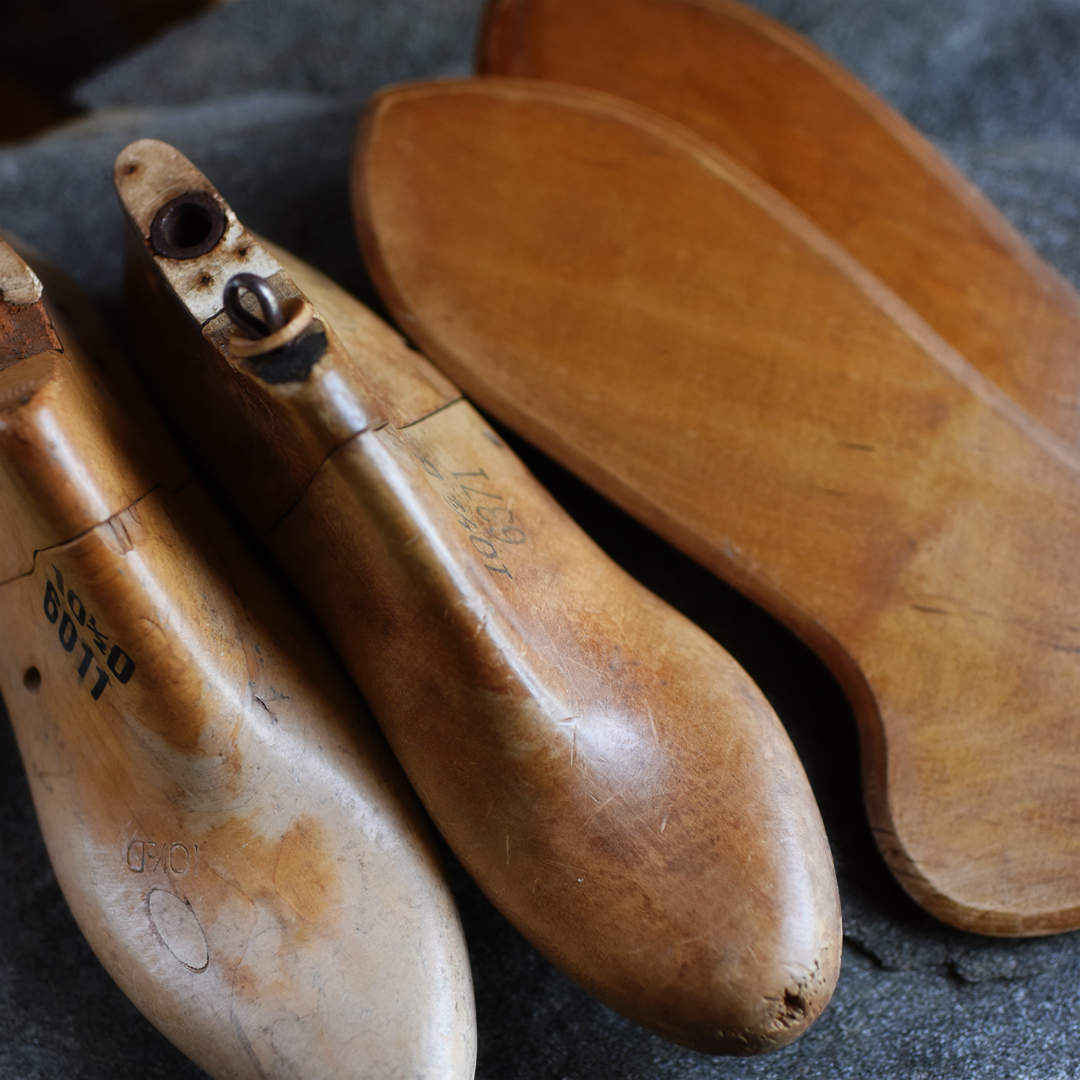
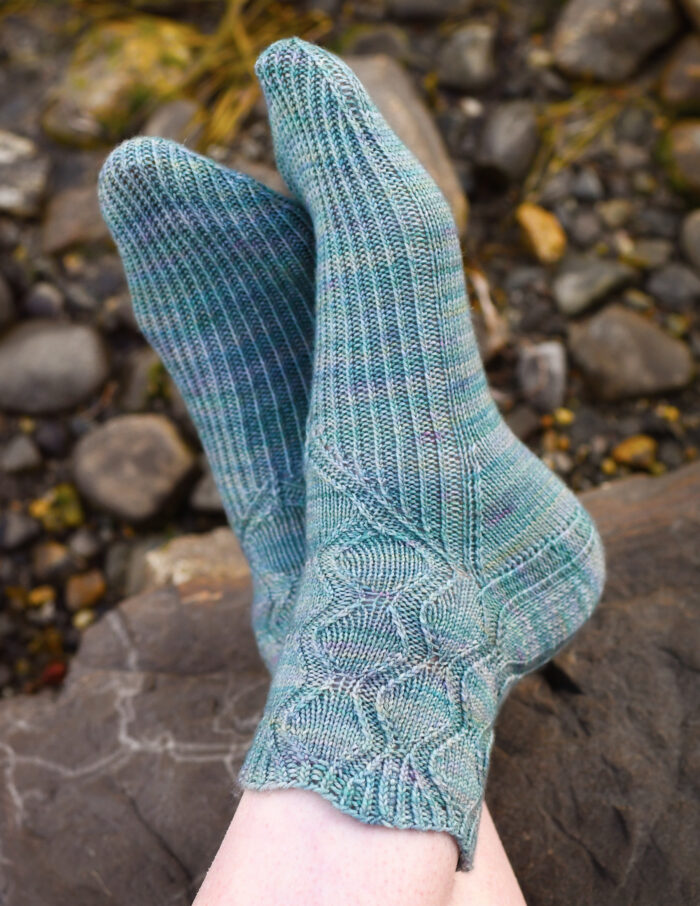
I’ve also got both shoe forms (for blocking slippers) and sock blockers. If you knit a whole bunch of socks, and you’re really invested in either taking pretty pictures of your socks or in having them look amazing when you give them to someone as a gift, you can get sock blockers. Otherwise, I maybe wouldn’t bother. Same for the shoe forms. I have these things because it’s my job to take really pretty pictures of knits…so pretty they convince you you want to make that thing. So I have fancy tools to get the blocking and photos just right (if you just want them because they’re pretty and they go with your head forms and hand forms, you can search ebay and etsy for ‘shoe lasts’ or ‘vintage sock blockers’ or you can find new sock blockers at many yarn stores). But if that wasn’t my goal, for socks and slippers I’d just let socks and slippers dry flat.
But again…to sort of pull out the common threads here…get it wet (and I vote for getting it clean while you’re at it), then hold it in place while it dries. You can get fancy with that ‘hold it in place’ part (and I’ll provide links to some tools I use at the end), but you don’t have to. Just wetting the yarn to relax it, then letting it dry in place will work wonders. It’s ten more minutes of work to make that knitting you spent hours and hours on look so much better! Don’t believe me? Yarn Harlot walks you through blocking a project over here if you want to watch the whole thing.
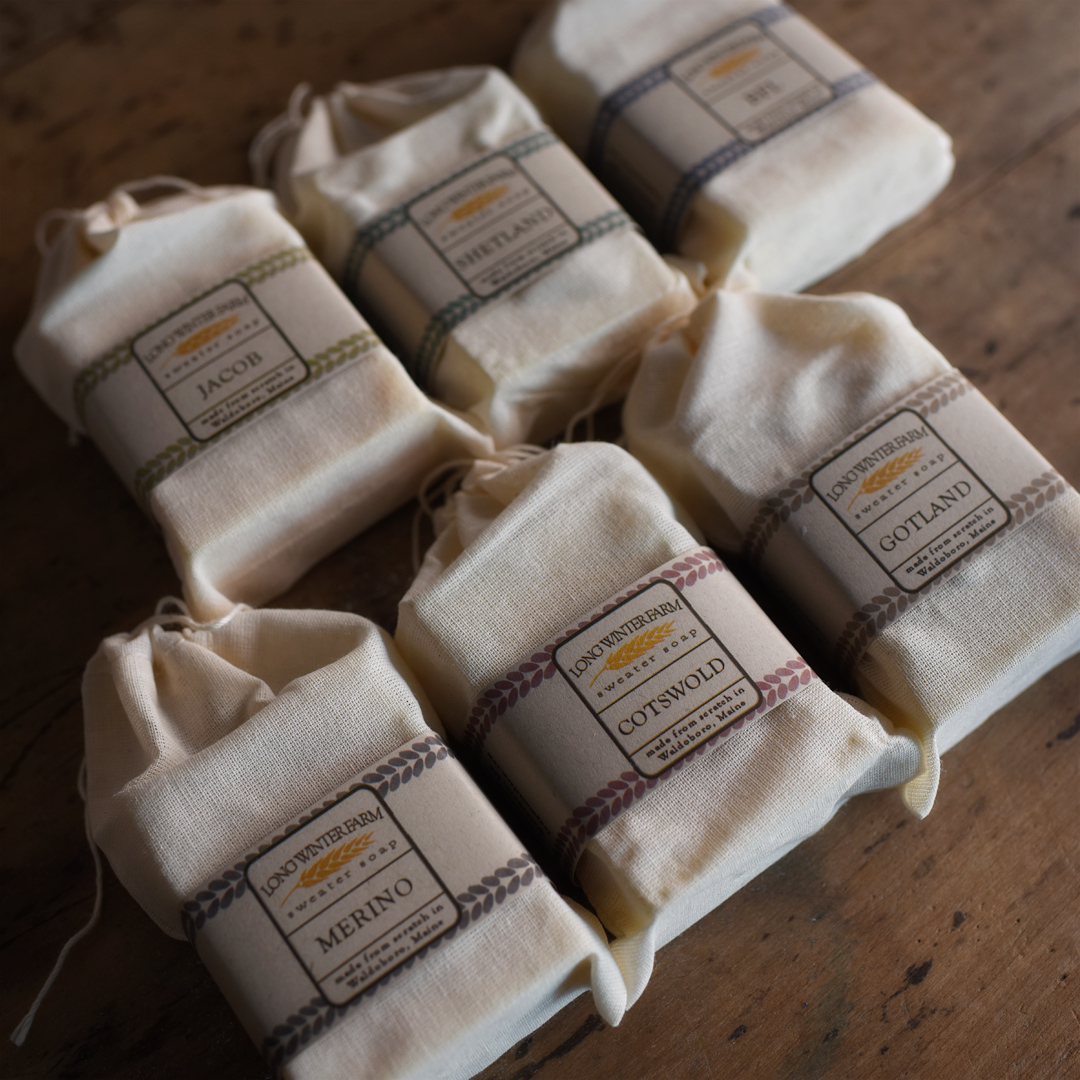
And, as a little incentive to make blocking extra fun, I have some samples of the awesome sweater soap my friends at Long Winter Soap Company just introduced. I’ve never seen a solid wool wash before, but I’ve been using it for the last few weeks, and I’m smitten (it’s much harder to accidentally use too much soap, which is a thing that always happens to me when I use liquid soaps…and there’s zero chance of it exploding in your suitcase). I’ve got samples to send to someone here and over on instagram. If you need to give it a try, just leave a comment here telling me about your biggest blocking transformation (or, if you haven’t blocked anything yet, tell me what you’ll block first). Comments left this week are entered to win. I’ll pick a winner next week and reach out to them for their mailing address (you need to use a real email address or else I can’t get in touch if you win, I won’t do anything else with that email other than contact the winner, if I don’t hear back from the winner within 3 days, I’ll pick a new winner and try again).
And if you want to get your hands on some of the tools I use, these are some of my favorites (as always, amazon links are shameless, shameless affiliate links…if that bugs you, I have total faith in your ability to go search for them on amazon yourself, I’ll never ever know).
- They make blocking mats, into which you stab pins (sometimes accompanied by blocking wires), on those occasions when something does want a good yank. Some people also swear by blocking combs, but I’m the sort who wants to put one pin in each stitch or each lace repeat, so they never feel quite precise enough for me. The mats come in sets intended for crafters (with grids marked out on them to help you pin stuff straight), but you can get way more surface area for way cheaper if you buy the sort that are meant to be floor tiles for gyms or playrooms. For pins, I like the 2 inch ones, and be sure they’re rustproof. I have the blocking wires from Inspinknity and I love them!
- If you don’t want to track down a vintage head form (pretty, but they can get spendy), but you still want that lovely precise head shape, wig stands are a great choice. They’re way less expensive than the old ones, and you can get the size you need. These are wrapped in fabric and sort of neat looking, these are styrofoam and much cheaper, but not really as pretty (a lot of the styrofoam ones run small, so make sure you’re getting one that’s big enough for your head).
- There are modern sock blockers and even glove blockers and mitten blockers if you’re so inclined.
- And of course, I’m putting in a total vote for getting yourself a yummy wool wash. The Long Winter Soap Company stuff is my current fave (I like the star anise and clove scent, but it comes in unscented too), but I’ve used Eucalan and Soak in the past and they’re lovely too.
Whew…I warned you I had lots to say about blocking. Come back every day the rest of this week and I’ll show off a pattern that really benefits from blocking and talk a little about just how you do it!
Mailing List
Want to hear when a new pattern comes out or something fun is going on? Sign up below!
Patreon
Want to support the content I create, get nifty bonus material for some of my favorite patterns, or get every new release delivered right to your inbox? Head over to patreon and sign up!